Announcement

Collapse
No announcement yet.

Announcement

Collapse
No announcement yet.

Bqeel M9C Max Review

Collapse
X
 
  • Filter
  • Time
  • Show
Clear All
new posts

    Bqeel M9C Max Review


    Bqeel M9C Max Smart TV Box [S905X/2G/16G eMMC/4k] Android 6.0 Marshmallow Amlogic S905X Chipset Android Box H.265 HDMI 2.0 Decoder 4k.2k Output 2.4G WIFI Smart TV Box


    Hi all,In this review im going to be looking at the Bqeel M9C Max

    Quick Facts
    CPU: S905X quad-core cortex-A53 frequency - 2.0G
    GPU: Mali-450 5-Core GPU
    FLASH: 16GB emmc
    SDRAM: 2GB DDR
    Power Supply: DC 5V/2A
    OS: Android6.0
    WIFI: RTL8189 802.11b/g/n
    High Difinition video output: SD/HD max.1920x1080 pixel
    LAN Ethernet: 10/100M, standard RJ-45
    Wireless: Built in WiFi
    4K2k hd decoding: 4k2k H.265 Hardware Video Decode and 4k2k Output
    1080P/AV/Dolby/3G: Support
    SPDIF/IEC958: Coaxial
    Bottom navigation bar
    Rooted

    Highlights (from webpage)

    Bqeel M9C Max TV Box is coupled with Amlogic S905X CPU quad-core cortex-A53 CPU up to 2GHz (DVFS) Mali-450 5-Core GPU, which supports 4K x 2K up to 60fps. Super mini size and more functional.

    Bqeel M9C Max Android TV Box carries the newest version with Android 6.0 OS. 2GB of DDR3 Ram and 16GB of eMMC Storage allow users to enjoy faster read & write speed and make the TV BOX run more stablely and smoothly. 32G Max Extended Capacity gives more space to browse websites, play games, and run apps with free barrier.

    Bqeel M9C Max smart TV box is a good way ahead in image processing and computing. 3D GPU processor delivers the necessary graphics for 2D/3D Games and ultra HD quality pictures. 4K 1080i/p resolution is 4 times of full HD.

    Bqeel M9C Max Android Box gets 2 USB ports. You can connect your mouse and keyboard to the box for helping your operation more convenient. Infrared Remote control lets you enjoy your wonderful life easily that the wireless brings to you.

    A quick Video showing the UI etc etc


    Device
    The Bqeel M9C Max is overall not a bad device.
    The boot time is around 35/40 seconds so not fast but not slow either,There is A bottom or top status bar,We like that :-)
    The remote that Bqeel M9C Max comes with is a IR Remote Arrrh I hate IR remotes when a cheap Airmouse does a much better job.
    The Bqeel M9C Max gets warm but not hot,Theres no venterlation holes at all for airflow,I was expecting it to get hotter than is does as there's only a large slab of metal fitted (Heatsink)but no the temp is good on this unit.
    Once booted up it takes you to the Oranth launcher home screen shown below (A nice looking UI)

    Home screen


    App Draw


    Some internal photos


    Some tech Stuff

    Antutu


    Antutu video tester


    CPU Z


    WIFI


    Games
    Iv tested beach buggy blitz with graphics set to high it played perfect.
    I could not use my ps3 game pad as the MC9 MAX has no bluetooth
    So i used the tronsmart Mars G01 Game pad that works well

    Misc
    Logitech c270 camera works fine
    External powered 1T HD works fine
    Tronsmart Mars G01 game pad works
    32GB sd card works fine

    Firmware (2017/04/26)
    https://mega.nz/#!t5QBVJAL!jMNAlSaFl...N4yRp7235Y8KQY
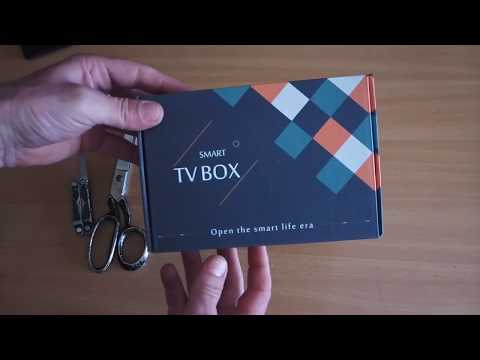
    Whats in the box
    1x M9Cmax Android Smart Box
    1x HDMI cable
    1x remote control
    1x UK adapter
    1x user manual

    Basic Unboxing Video

    Last edited by blinkone; 06-01-2017, 17:48.
    Please consider making a Donation to freakTab

    #2
    Good review. That is shiniest metal plate I've seen.
    Where did the M9C Max come from?
    Cheers.

    Comment


      #3
      Nice Review Blinkie....bullet wifi better then tape most times. Clear photos new ones popping up good to see Trebor doesnt have them all....
      Many devices now mk902ii/Shield/Mk68 /Ugoos/neox5/minix5 (yes they still work lol) mk80 no it doesnt work lol.

      Comment


        #4
        Originally posted by RISCy Dude View Post
        Good review. That is shiniest metal plate I've seen.
        Where did the M9C Max come from?
        Cheers.
        This ones from amazon https://www.amazon.co.uk/Bqeel-Andro...tv+box+M9C+Max

        Nice Review Blinkie....bullet wifi better then tape most times. Clear photos new ones popping up good to see Trebor doesnt have them all
        Ha ha Thanks,,I bet he does have it though you no trebor
        Please consider making a Donation to freakTab

        Comment


          #5
          Is there a custom rom available for this device?
          Is it possible to back up the current rom from the device, in case the custom tom fails?

          Comment


            #6
            Originally posted by gdhl823a View Post
            Is there a custom rom available for this device?
            Is it possible to back up the current rom from the device, in case the custom tom fails?

            Hi and welcome to freaktab.

            There's no custom rom that i no of right now for this device.

            Some of the s905x rom's might work (Maybe not the wifi)iv not had chance to test any yet.

            The stock Firmware (2017/04/26) is available in my review.

            Blinky
            Please consider making a Donation to freakTab

            Comment


              #7
              Hi all,

              my M9C max is stucked in boot logo, so I'd like to flash the ROM posted in this thread.
              How can I flash it since there is no USB OTG port in M9C max?

              Thanks

              Comment


                #8
                Originally posted by gfoiani View Post
                Hi all,

                my M9C max is stucked in boot logo, so I'd like to flash the ROM posted in this thread.
                How can I flash it since there is no USB OTG port in M9C max?

                Thanks
                You can try the Burn card maker method, using an SD card.

                I wrote some generic instructions here, with a download link for the tool as well.

                http://freaktab.com/forum/tv-player-support/beelink-aa/beelink-android-tv-box/gt1/firmware-roms-tools-cg/611261-rom-beelink-gt1-alfawise-s92-scv10b-android-6-1?p=627126#post627126
                R-TV BOX S10, Beebox N3150, Chuwi Hibox, Nvidia Shield, A95X Max

                Comment


                  #9
                  Thanks bluesmanuk for your reply.
                  I tried the burn card maker method with no success.
                  The sd card was created successfully but I think that there is no recovery installed in my TV box.
                  In my box there is nothing to press into the AV port, there is only the reset button under the box.
                  I inserted the sd card, pressed the reset button and, with the reset button pressed, plugged the power cable.
                  I released the reset button after some seconds but I can't see any updating screen or droid logo, I can see just the amlogic S905X logo.

                  Maybe I need to install a recovery?

                  Thanks

                  Comment


                    #10
                    Hi all,

                    I solved using a Male-to-Male USB cable and Amlogic USB Burning Tool (version 2.0.8).
                    The following link explains the procedure:


                    Thanks.

                    Comment


                      #11
                      Originally posted by gfoiani View Post
                      Hi all,

                      I solved using a Male-to-Male USB cable and Amlogic USB Burning Tool (version 2.0.8).
                      The following link explains the procedure:


                      Thanks.
                      Hi there, Were you able to install the rom?

                      Comment


                        #12
                        Yes, I do.
                        I'm using that ROM now on my box.

                        Comment


                          #13
                          Originally posted by gfoiani View Post
                          Yes, I do.
                          I'm using that ROM now on my box.
                          Great! I am having difficulties doing my own USB Cable... I am unsure if it is due to crappy quality USB cables I might be using... But definitely it looks like SD is not an option as the SD burner software is not compatible with Windows 10 (it keeps crashing).

                          Would you mind summarizing the procedure you followed to get this successfully done?

                          I would (and most likely a lot of people) would be very thankful for this.

                          -g

                          Comment


                            #14
                            Originally posted by gaizka View Post

                            Great! I am having difficulties doing my own USB Cable... I am unsure if it is due to crappy quality USB cables I might be using... But definitely it looks like SD is not an option as the SD burner software is not compatible with Windows 10 (it keeps crashing).

                            Would you mind summarizing the procedure you followed to get this successfully done?

                            I would (and most likely a lot of people) would be very thankful for this.

                            -g
                            As mentioned in my previous answer I just followed the procedure described in this thread:


                            These are the steps:

                            Things you will need:
                            1.) Download the Amlogic USB Burning Tool(I used version 2.0.8)
                            2.) A Male-to-Male USB Cable.
                            3.) The ROM image.
                            4.) A Windows PC.

                            Steps to flash:
                            1.) Install the USB Burning Tool to your PC.
                            2.) Run the tool. The second tab of the tool will let you choose English as the language(default is Chinese).
                            3.) From the tool's first tab, select load image to load the ROM image in to the tool.
                            4.) Click "Start" from the top right of the tool.
                            5.)Remove the power cable from the TV Box.
                            6.) Plug one end of the USB cable to the PC.
                            7.) Plug the other end of the USB cable to the box's USB OTG port and watch the tool to see if the box gets recognized. If it does not get recognized after a few seconds, do nothing to the tool. Remove the cable from the box, wait 5 seconds and reconnect the USB cable, watch the tool to see if the box gets recognized. If not, do nothing to the tool, remove USB cable, wait 5 seconds and repeat step 7.
                            When the box is recognized, you will see the tool begin to report progress.

                            Once the flash is 100% successful, click "Stop", remove the USB Male-to-Male cable and close the tool.
                            Reconnect the TV box's power cable.
                            The box should begin to boot. Note: First boot may take a few minutes.
                            That should do it.

                            Let me know if it works.

                            Comment


                              #15
                              Originally posted by gfoiani View Post

                              As mentioned in my previous answer I just followed the procedure described in this thread:


                              These are the steps:

                              Things you will need:
                              1.) Download the Amlogic USB Burning Tool(I used version 2.0.8)
                              2.) A Male-to-Male USB Cable.
                              3.) The ROM image.
                              4.) A Windows PC.

                              Steps to flash:
                              1.) Install the USB Burning Tool to your PC.
                              2.) Run the tool. The second tab of the tool will let you choose English as the language(default is Chinese).
                              3.) From the tool's first tab, select load image to load the ROM image in to the tool.
                              4.) Click "Start" from the top right of the tool.
                              5.)Remove the power cable from the TV Box.
                              6.) Plug one end of the USB cable to the PC.
                              7.) Plug the other end of the USB cable to the box's USB OTG port and watch the tool to see if the box gets recognized. If it does not get recognized after a few seconds, do nothing to the tool. Remove the cable from the box, wait 5 seconds and reconnect the USB cable, watch the tool to see if the box gets recognized. If not, do nothing to the tool, remove USB cable, wait 5 seconds and repeat step 7.
                              When the box is recognized, you will see the tool begin to report progress.

                              Once the flash is 100% successful, click "Stop", remove the USB Male-to-Male cable and close the tool.
                              Reconnect the TV box's power cable.
                              The box should begin to boot. Note: First boot may take a few minutes.
                              That should do it.

                              Let me know if it works.
                              Thank you. Any tips on create the USB male to male cable?

                              Comment

                              Working...
                              X