T95X2 Amlogic S905X2 Android 8.1 4GB DDR4 32GB eMMC KODI 18.0 4K TV Box with LED Display Dual Band WiFi LAN USB3.0
Main Features
* Android 8.1 operation system
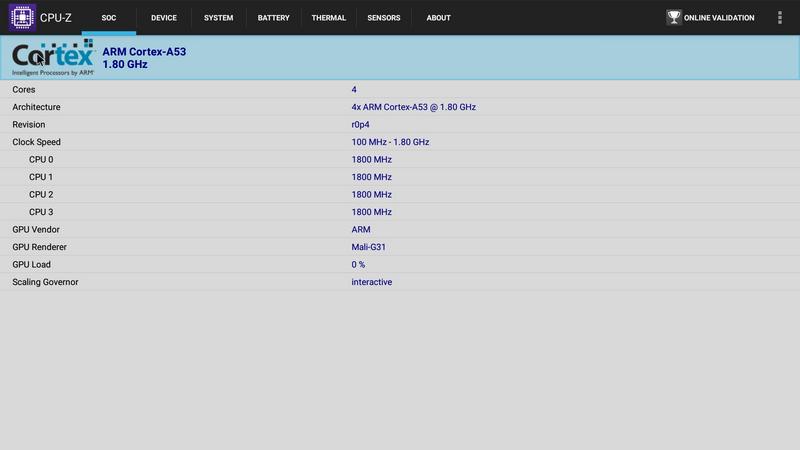
* Amlogic S905X2 CPU, quad core, Cortex A53
* Davlin MP2 GPU
* 2GB RAM + 16GB ROM / 4GB RAM + 32GB ROM
* Support 4K UHD images display
* Support H.265 decoding
Hi Guys,
Another Tv box to take a look at today,The Sunvell T95x2 a Amlogic powered TV box.The T95x2 im testing is the 4/32GB version that should be more than enough room for most users,Running Android 8.1 out the box,I should mention that theres no top and bottom bars in the UI.Iv been using this box for the past 2 months and its doing everything i need with a fast boot up apps load nice and quick.
The Device in this review came direct from
Sunvell Get your from the usual sellers
Highlights (From webpage)
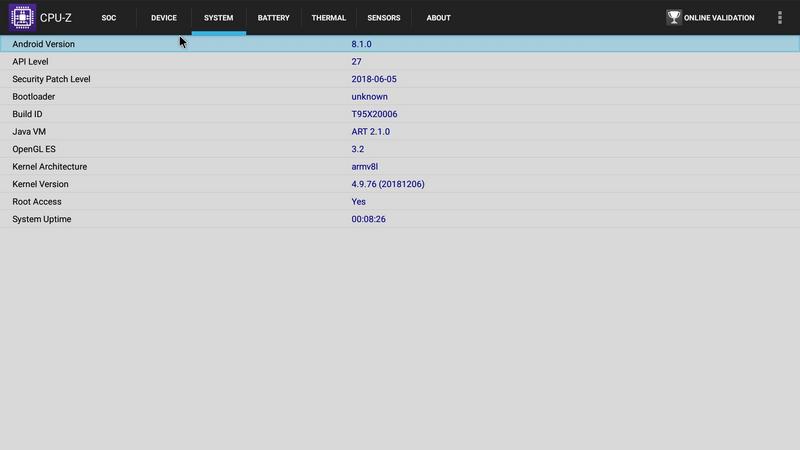
Android 8.1
T95X2 is one of the first TV Boxes to run on Android 8.1 (an update to Oreo). This software update allows for a great user experience with steady performance.
Amlogic S905X2
This Amlogic S905X2 processor fully supports premium 4K UHD video. This powerful 64bit CPU and ARM Dvalin MP2 GPU combination handle 4K graphics better than most products on the market.
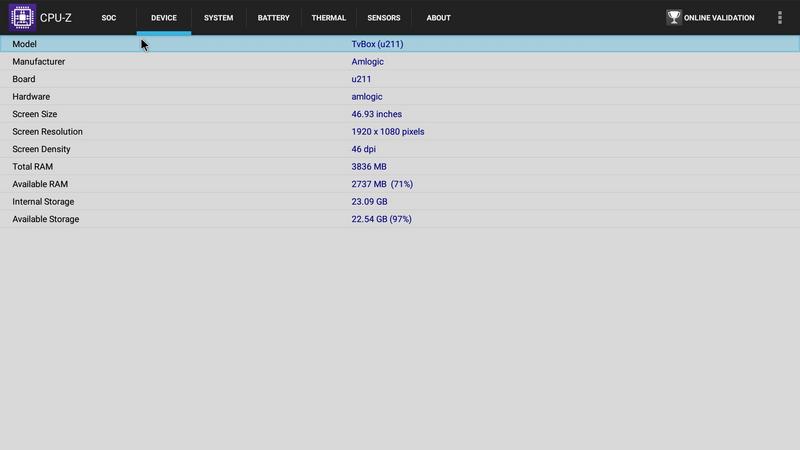
DDR4 4GB RAM + eMMC 32GB
It uses a DDR4 4GB RAM and an eMMC 32GB for better performance, security and reliability.
2.4G/5G Dual Band WiFi
With support for 2.4Ghz and 5Ghz band, it can transmit higher amounts of data.
True 4K Media Player
While your average media box might only accept 1080P video playback, this gadget plays just about any 4K source.
Looks and feel
It comes with just the one launcher installed.A tv box launcher.
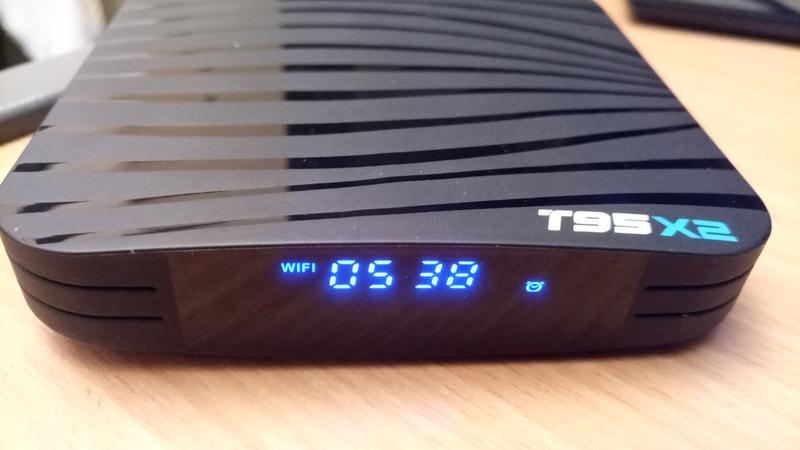
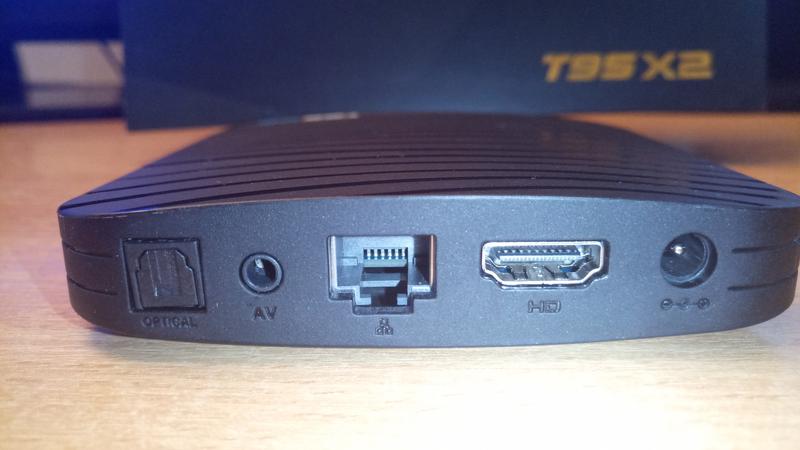
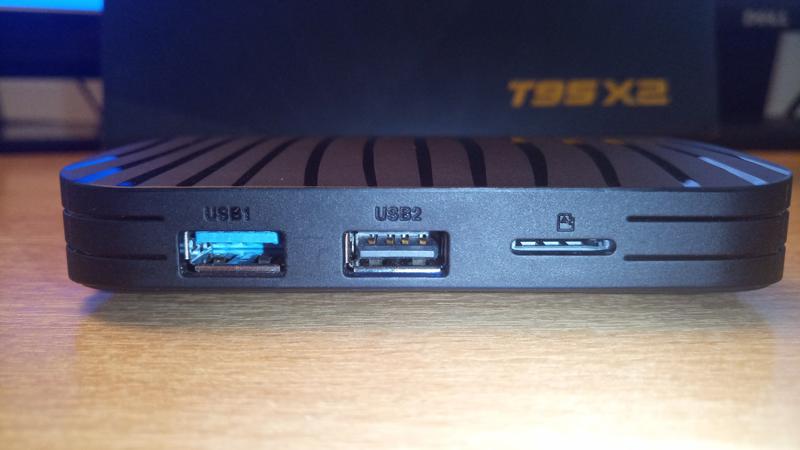
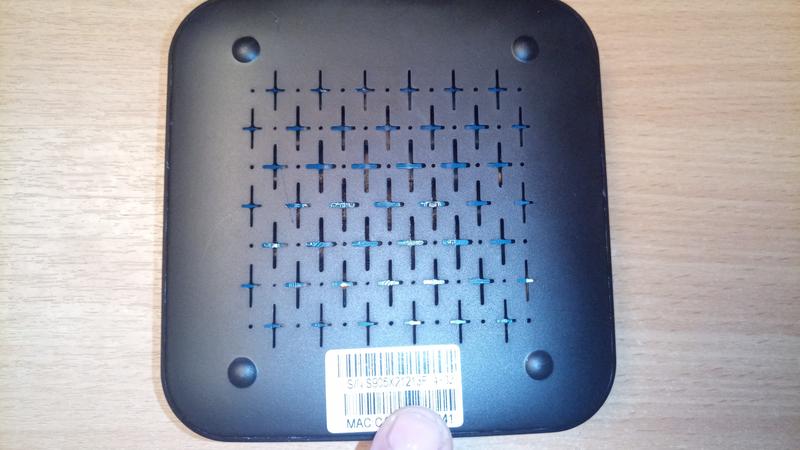
The device itself is a small square tv box with a front facing clock.The T95x2 has no rubber Pads on the bottom so it does slide arond the desk a bit.,The whole underside is covered in holes for Venterlation.It has 2 full sized USB ports one USB3 & one USB2,Micro SD card slot,HDMI port,Power input,AV port,RJ45 port & a Spdf port.The IR remote has good range & works ok (Air mouse is better)There is a recovery button hidden behind the AV hole on the rear.
Front
Rear
Left hand side
Underside
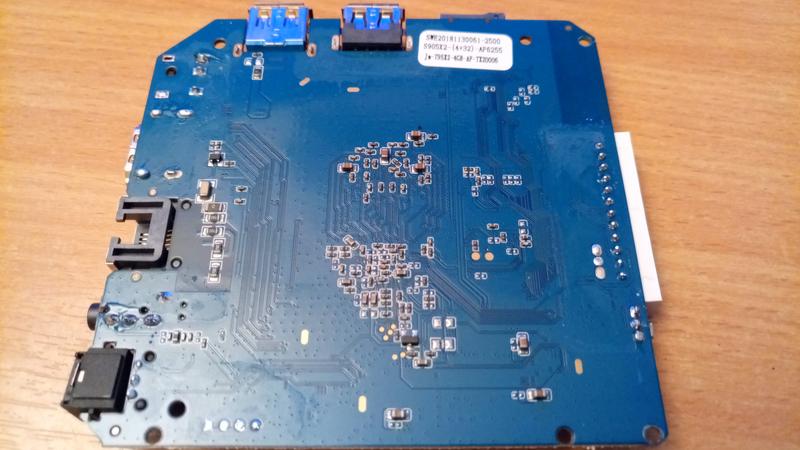
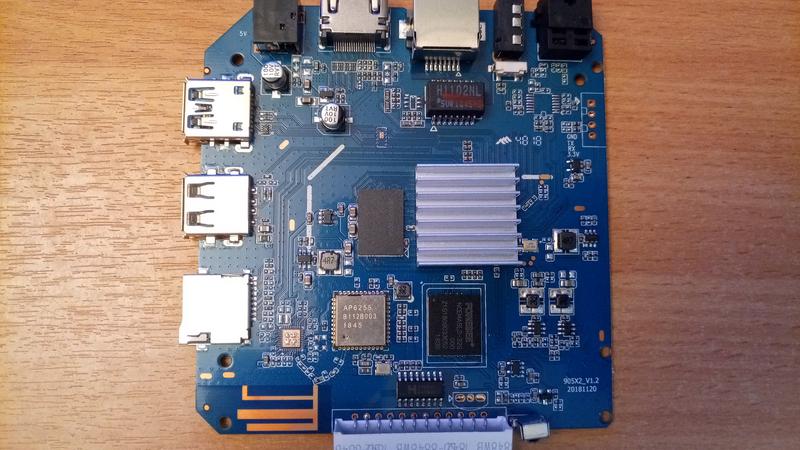
Internal Photos
Back cover removed (Just upclip)
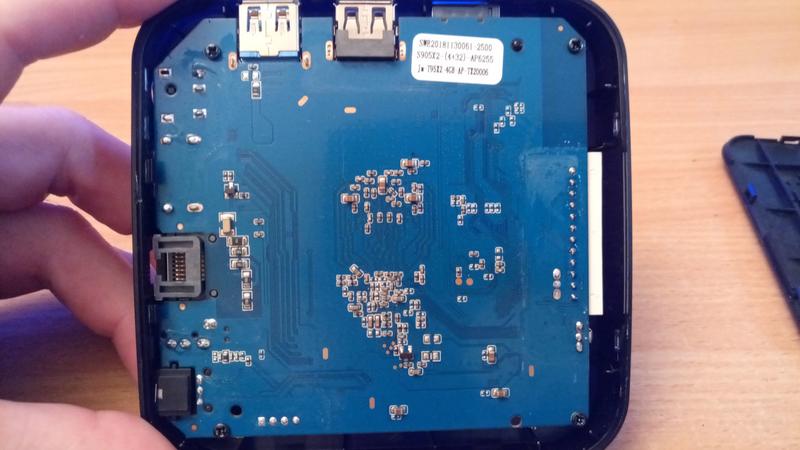
Rear of PCB
Top of PCB
Recovery button

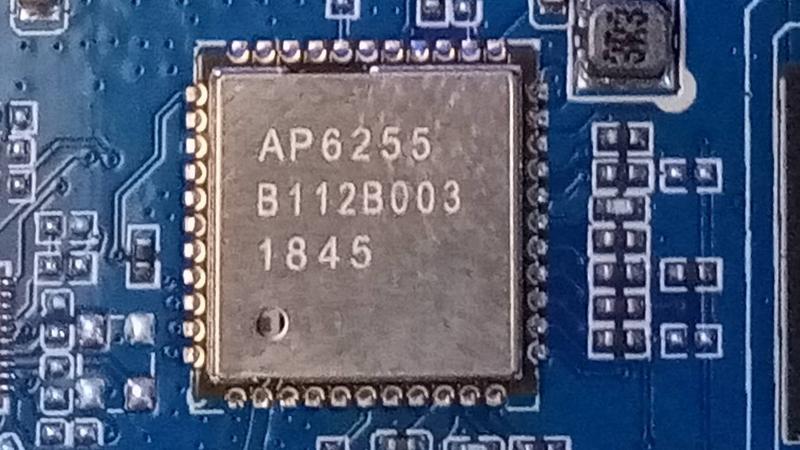
WIFI Chip AP6255
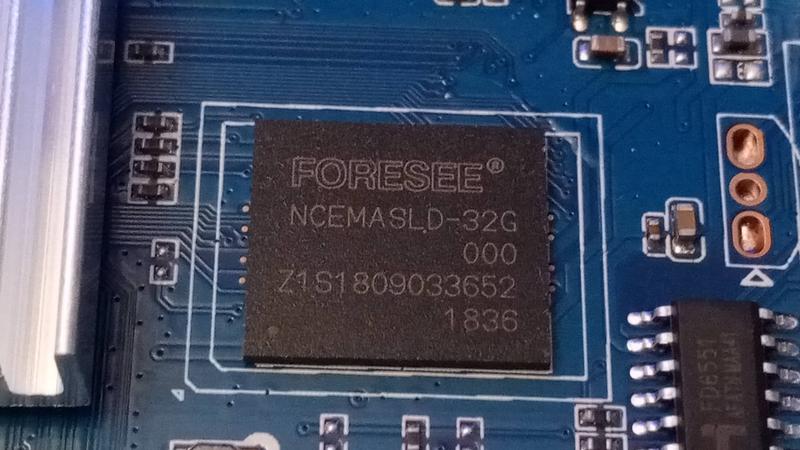
Nand chip
So lets have a tinker,the device takes around 35 to 40 seconds to boot up to the home screem (Shown below)
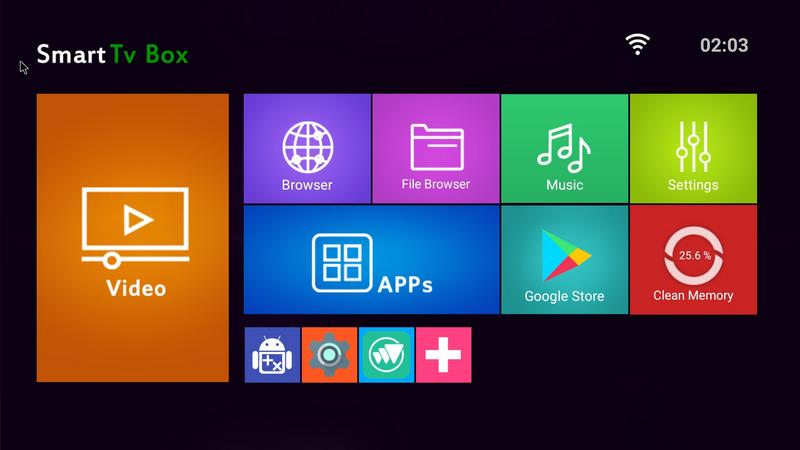
The T95x2 comes running Android 8.1 and is doing the job so far,The device is also rooted.
Theres no crap installed just the basic stuff to get you going (App Draw below)
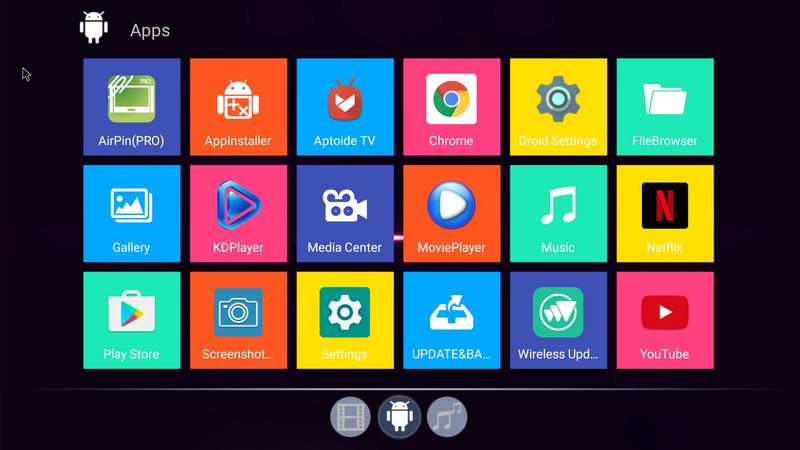
Chrome
KDPlayer (Kodi 18 beta)
Netflix
playstore
Youtube
Aptoide
Google play store is pre installed and working fine showing apps that i like to see on a tv box
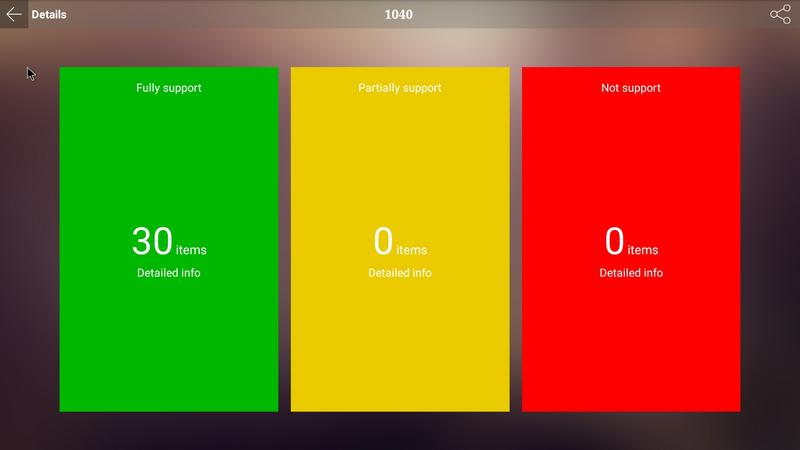
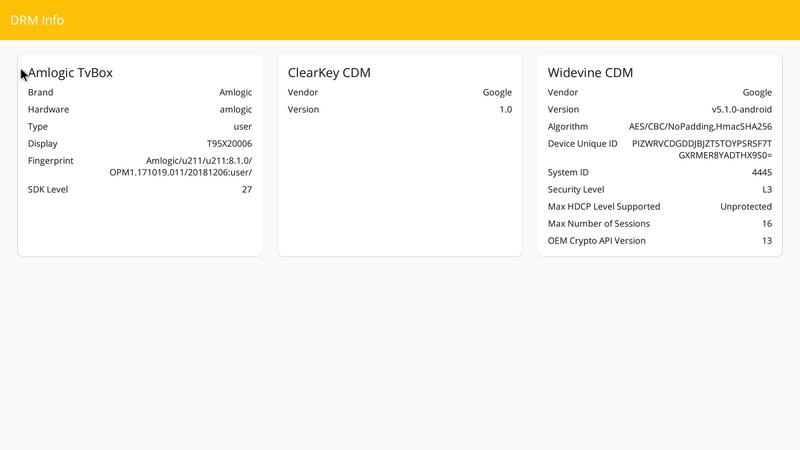
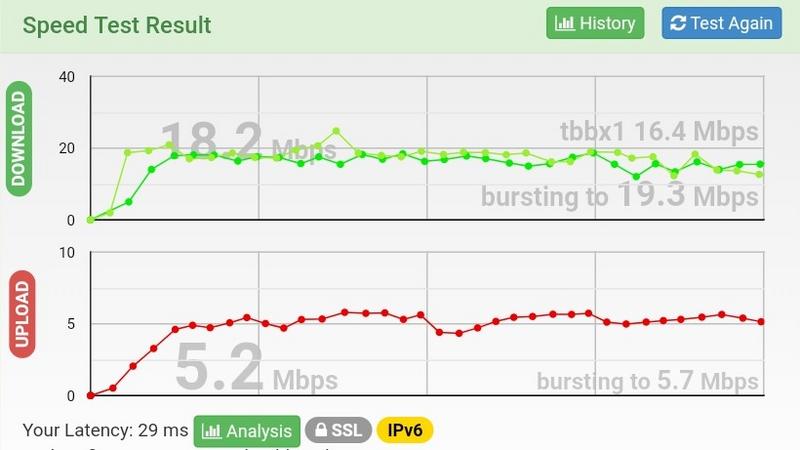
Some teck stuff
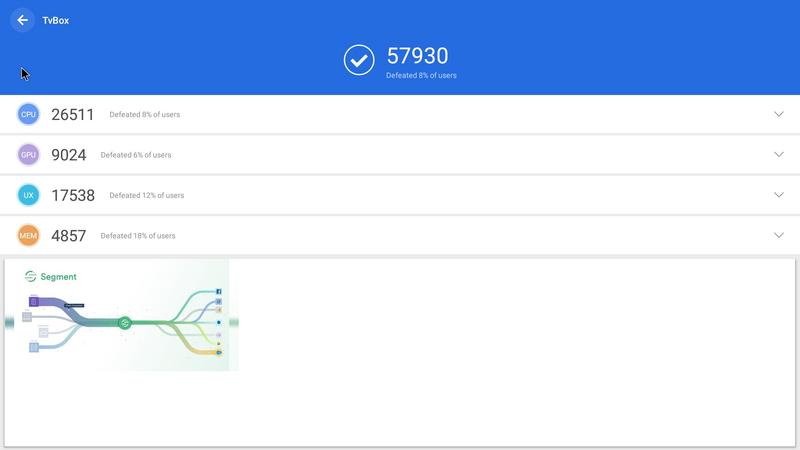
Antutu bench mark
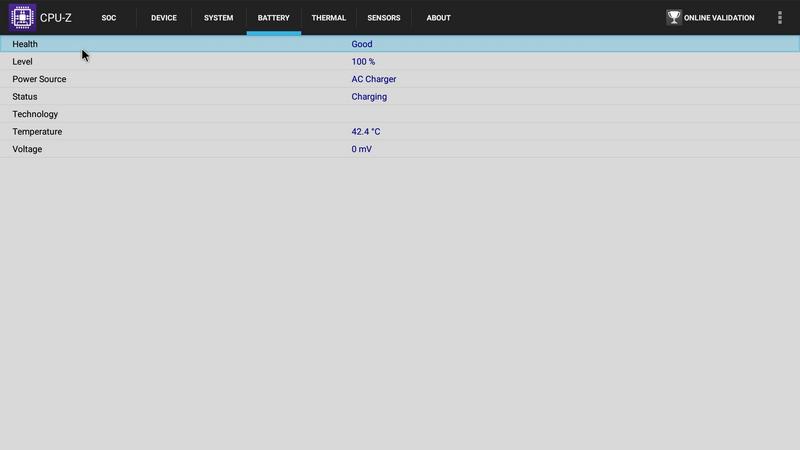
CPU Z
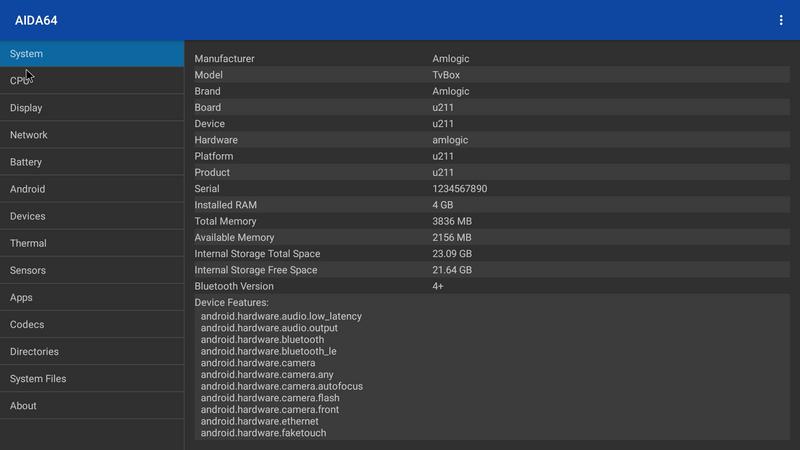
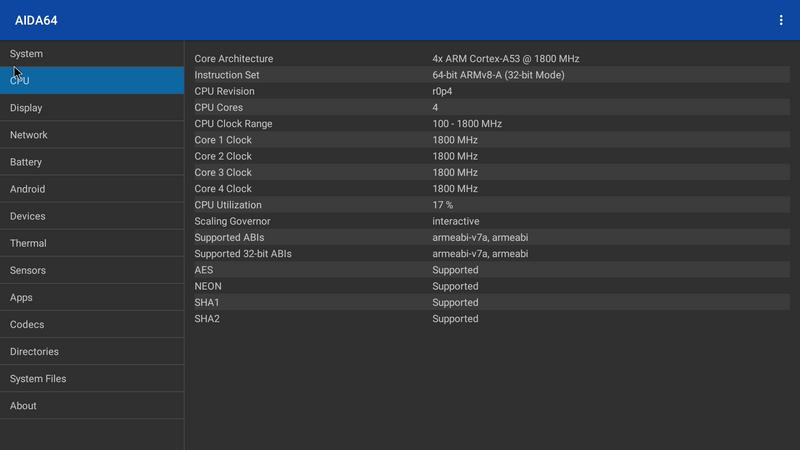
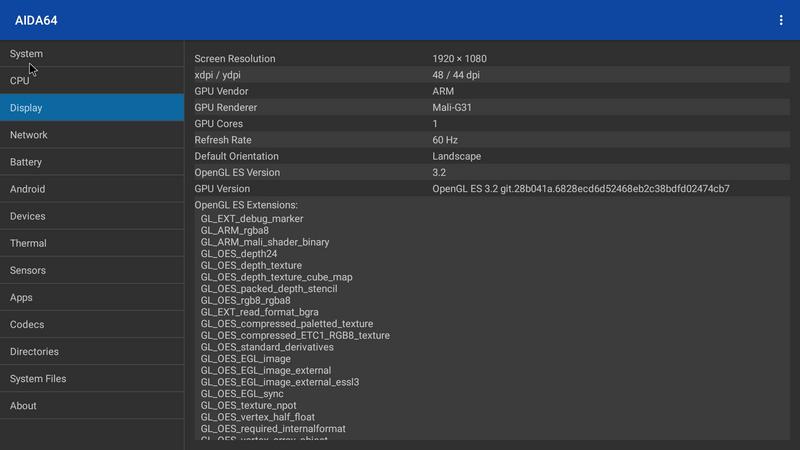
Aida 64
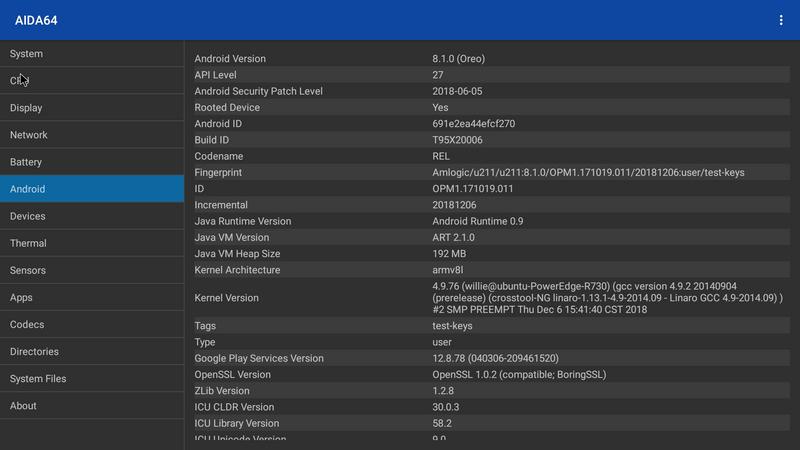
Antutu Video Tester
DRM
WIFI
Games testing
Beach buggy blitz (Works)
Ashpalt 8 loads and plays perfect
Ashpalt 9 (Works)
Sixaxis app (dont work)
Other info
Logitech c230 webcam (Works) also installed google voice search and that also works by using the webcam mic.
Sixaxis app (Dont work)
Samsung 1TB external HD (Works)
Tronsmart Mars G01 gamepad (Works)
32GB micro SD card (Works)
HDMI CEC (Works very well)
Firmware & install guide
(Stock firmware) Image & SD update 2019/01/09
https://mega.nz/#!AsdhxSoR!APaIyc4A3...j0E5vAx04DpbiE
1. Download USB burning tool 2.1.6.8 (Included above)specially made for S905x2 devices and install it
2. Open USB burning tool and click "File" at the top left of the program
2. Click import image then select the aml_upgrade_package.img file
4. Once the firmware has loaded click the "Start" button in the burning tool
5. Remove all USB's and anything plugged into your device
6. Connect one side of the Male to Male USB cable to the USB 2.0 port of your device and the other to a USB port of your PC.
7. Wait until the progress bar reaches 100%, then click the "Stop" button and reconnect your device to your TV.
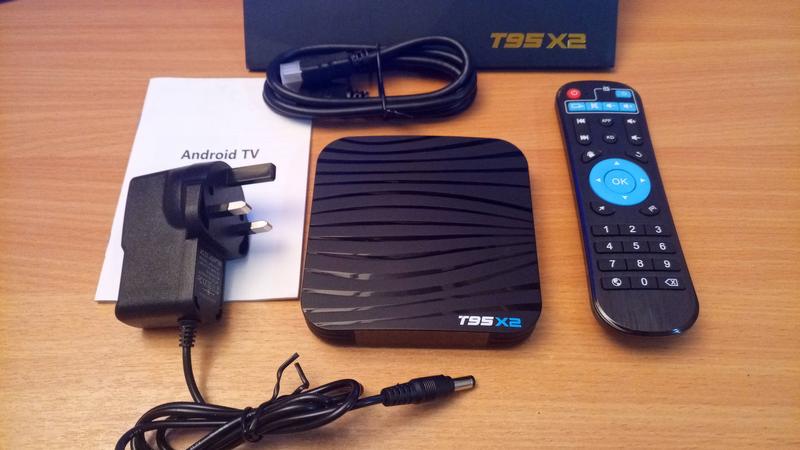
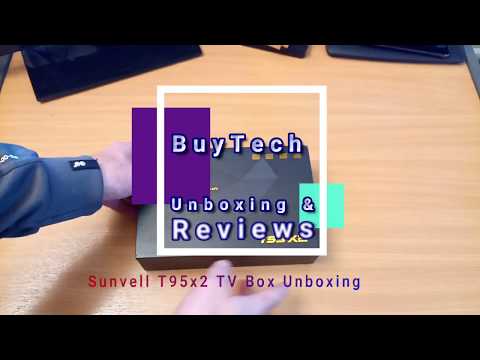
Unboxing
Whats in the Box
1x TV Box
1x Remote Control
1x HDMI Cable
1x Power Adapter
1x English Manual