Station P1 RK3399 - Custom Android Nougat Firmware v1.0
Build with Google Gapps
Google GMS Certified - no need to manually register GSF ID
Wifi on by default
Preinstalled some apps like Nova, Kodi, MiXplorer
Add fractional frequencies in whitelist(23.976,29.97, 59.94hz)
Fix Youtube(SmartYoutubeTV) freezing problem with VP9 codec
Enable Wallpaperservice
Fix Amazon Prime Video not working
Improve velocity for better scrolling and response
Fix home button not working on airmouses
Add write mode for external storage
Reduce animations
Fix 10-bit h264 video playback
Kodi frame-rate switching added(still has some zoom bug after video played, keep disabled if not needed for now)
Force landscape orientation needed for some apps
Add-block(140000+ sites adds blocked)
Remove root and added Magisk Root
Add FlAC audio 192000hz playback support
Grid layout for recent apps
- Long press OK button on ir remote to close current window app
- Long press back to close all apps
Volume steps increased to 20 for better audio volume management
Update Busybox to latest version
Bootanimation replaced with stock Station P1
Settings - 2 apps available + Firefly Settings
Set RKTvLauncher as default launcher and added Lawnchair as secondary launcher
Add MediaCenter v3.5.4 app
Added several gamepad keyboard layouts
Add Widevine DRM L3 support
Supports browsing with airmouses in any web browser
Download Link: Here
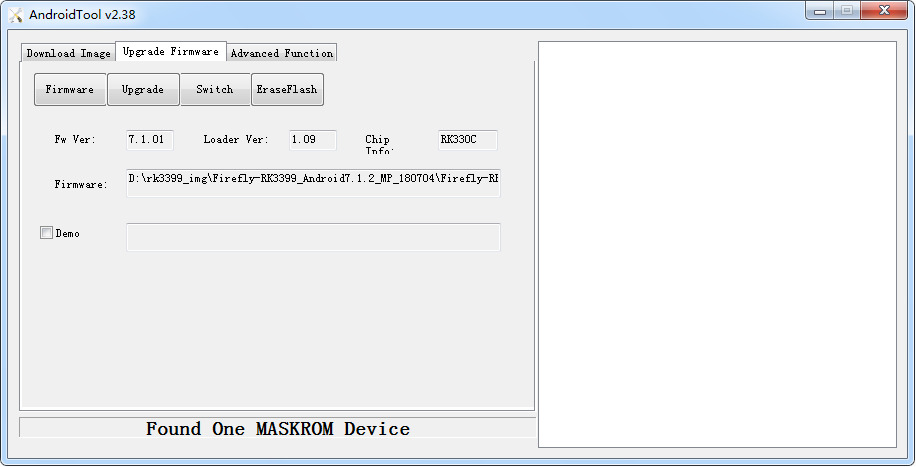
(Flash with AndroidTool v2.71 or higher(EraseFlash, Upgrade)


Build with Google Gapps
Google GMS Certified - no need to manually register GSF ID
Wifi on by default
Preinstalled some apps like Nova, Kodi, MiXplorer
Add fractional frequencies in whitelist(23.976,29.97, 59.94hz)
Fix Youtube(SmartYoutubeTV) freezing problem with VP9 codec
Enable Wallpaperservice
Fix Amazon Prime Video not working
Improve velocity for better scrolling and response
Fix home button not working on airmouses
Add write mode for external storage
Reduce animations
Fix 10-bit h264 video playback
Kodi frame-rate switching added(still has some zoom bug after video played, keep disabled if not needed for now)
Force landscape orientation needed for some apps
Add-block(140000+ sites adds blocked)
Remove root and added Magisk Root
Add FlAC audio 192000hz playback support
Grid layout for recent apps
- Long press OK button on ir remote to close current window app
- Long press back to close all apps
Volume steps increased to 20 for better audio volume management
Update Busybox to latest version
Bootanimation replaced with stock Station P1
Settings - 2 apps available + Firefly Settings
Set RKTvLauncher as default launcher and added Lawnchair as secondary launcher
Add MediaCenter v3.5.4 app
Added several gamepad keyboard layouts
Add Widevine DRM L3 support
Supports browsing with airmouses in any web browser
Download Link: Here
(Flash with AndroidTool v2.71 or higher(EraseFlash, Upgrade)


Comment