Upgrade Guide can help you to reflash your device based on RK3066 RK3188 RK3188T RK3288 RK3368 RK3229
This is a common guide for reflashing RockChip based devices. All RK SoC supports the same applications and drivers for Host system. Differences can be in hardware parts, so you need to detect OTG port and recovery buttons correctly.
BEFORE START
What you need:
Image file
Host PC
USB OTG Cable
Supported host OS: Windows XP (32/64bit) Windows 7 (32/64bit) Windows 8 (32/64bit) Windows 10 (32/64bit)
The first thing you need is to download the archive with firmware. Inside archive, you find:
BatchTool or Android Tool - tool for reflashing
DriverAssitant - tool to install drivers and firmware image file
Firmware image
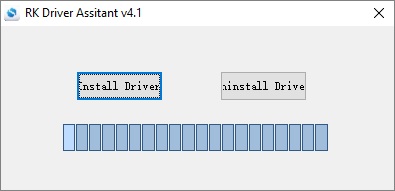
INSTALLING DRIVERS

Launch RK DriverAssitant and press “Install Driver”.
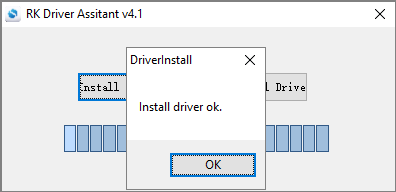
Apply all changes and warnings during installation until finishing message
CONNECTING TO PC
Run Batch tool or Android tool on your host PC.
In order to connect device with Host PC and run bootloader mode you should perform following steps:
1. Plug off device power adaptor.
2. Connect device to computer via usb OTG port, much better to use certified OTG USB cable from package.
3. Run Batch tool or RK Android tool
4. Hold the hardware recovery button.
5. Plug in power adaptor and Turn on device if not turning on automatically.
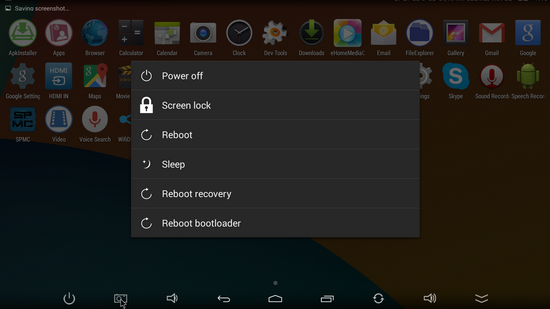
Tip: if you can’t hold recovery button or it’s broken you can reboot to bootloader from Ugoos power menu.
RECOVERY BUTTONS AND OTG USB PORTS LOCATION ON UGOOS DEVICES YOU CAN SEE IN THE END OF THIS INSTRACTION.
IF YOU USE ANDROID TOOL:
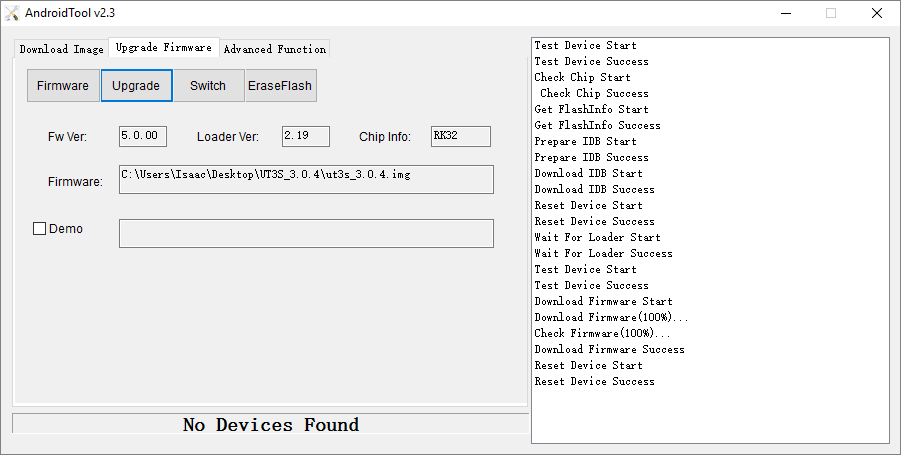
In Android Tool choose “Upgrade Firmware” inset. If you did everything correctly and the RK driver installed properly on your computer, ANDROID TOOL shows you message “Found One Loader Device “
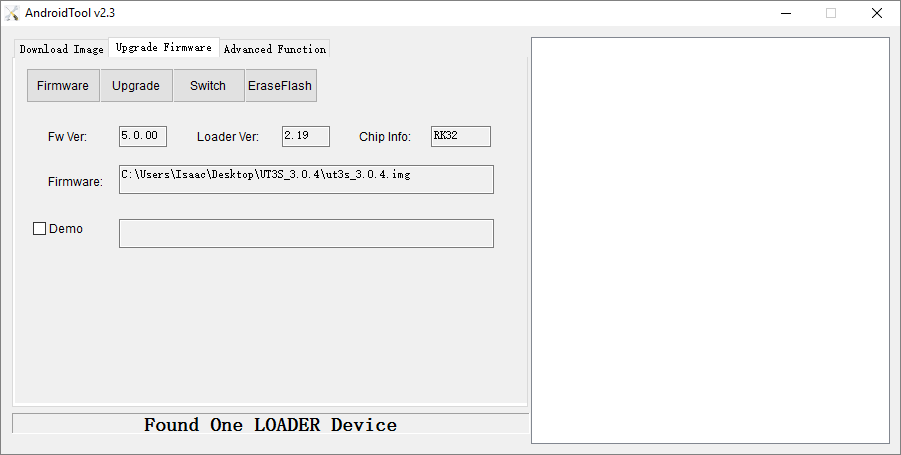
Click “Firmware” button and specify the path to the firmware file. You need to wait until the program download information about the firmware, then it will display report on the screen. Now click “Upgrade” button to start reflashing device. At the end, you will see a report indicating a successful operation.
For flashing dualboot or clear linux firmware (for example dualboot UT3/UT3s/UM3 firmwares)
Run Android Tool. If you did everything correctly and the RK driver installed properly on your computer, ANDROID TOOL shows you message “Found One Loader Device “ In Android Tool choose “Download Image” inset. Default program configured to flash "clear" android on your device. If you want install “Dualboot” or “Clear Linux” click right mouse button by program window, and then select “Load config”.
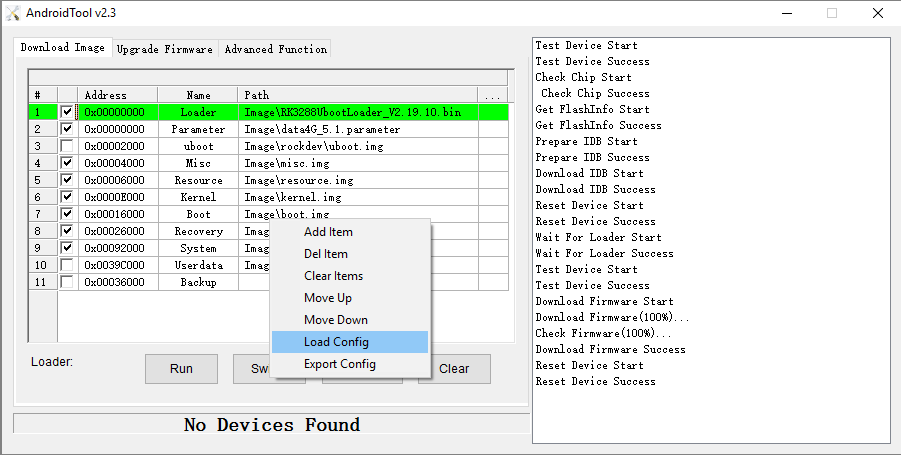
3. Then choose one of configurations files:
config.cfg - if want flash only Android
config_dualboot.cfg - if want flash dualboot
config_linux.cfg - if want flash only linux
3. Now click the “Run” button to start reflashing device. At the end, you will see a report indicating a successful operation.
IF YOU USE BATCH TOOL:
Run the Rockchip Batch Tool and click on the “…” to choose file with firmware. If you did everything correctly and the driver is installed on your computer, you will see green light on one of the indicators.
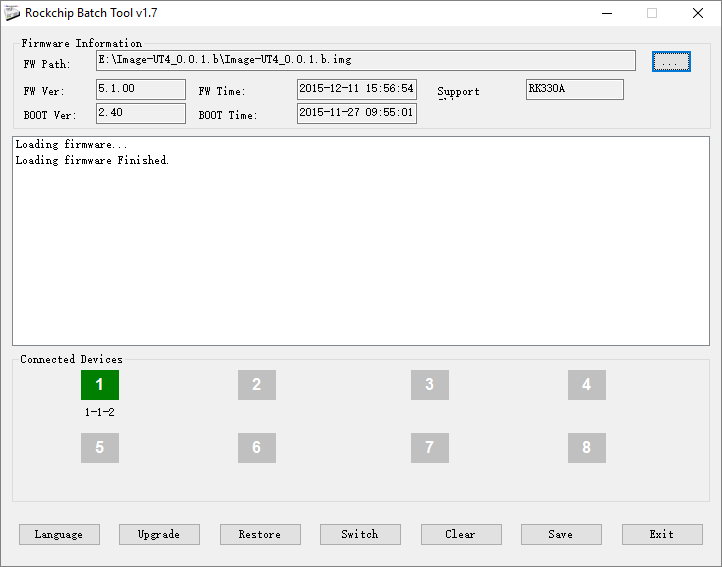
Now click the “Upgrade” button to the firmware of the device. At the end, you will see a report indicating a successful operation.
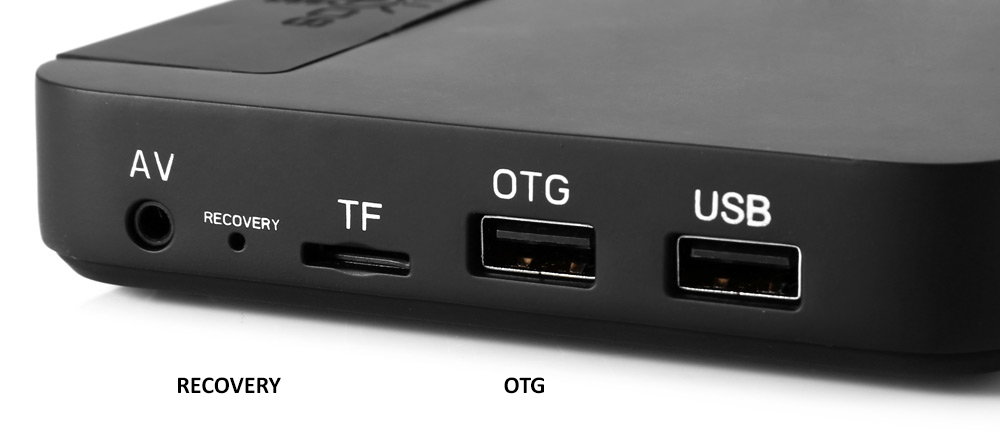
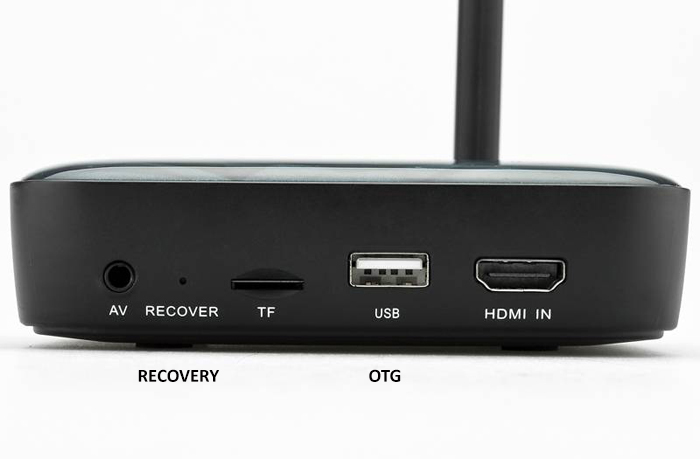
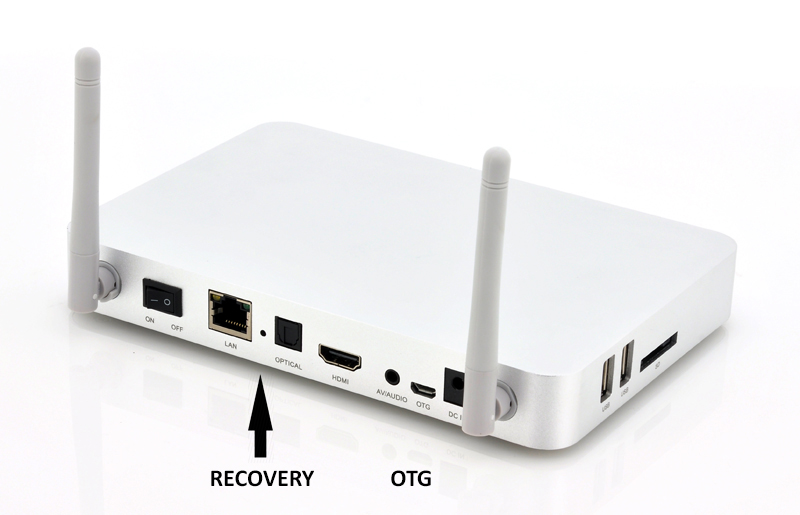
OTG usb ports and recovery buttons on Ugoos devices:
UT4/UT3+ new UT3s
Recovery button and USB OTG port is on the right side
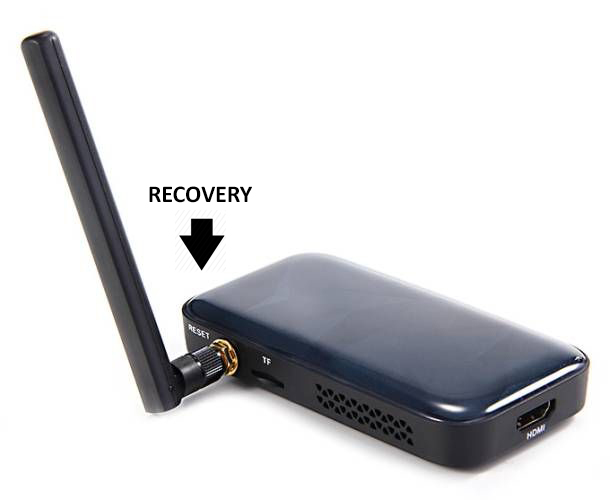
UT3/UT3s
Recovery button and USB OTG port is on the right side
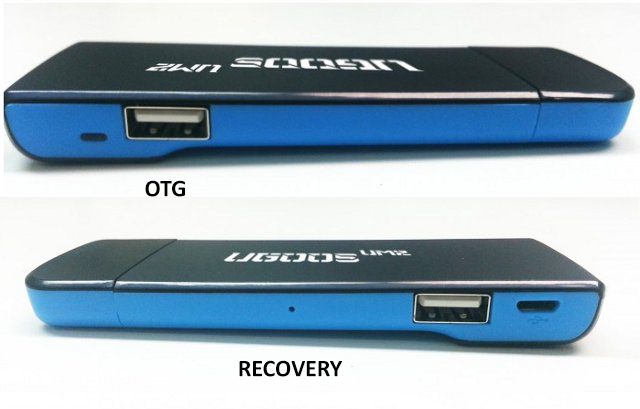
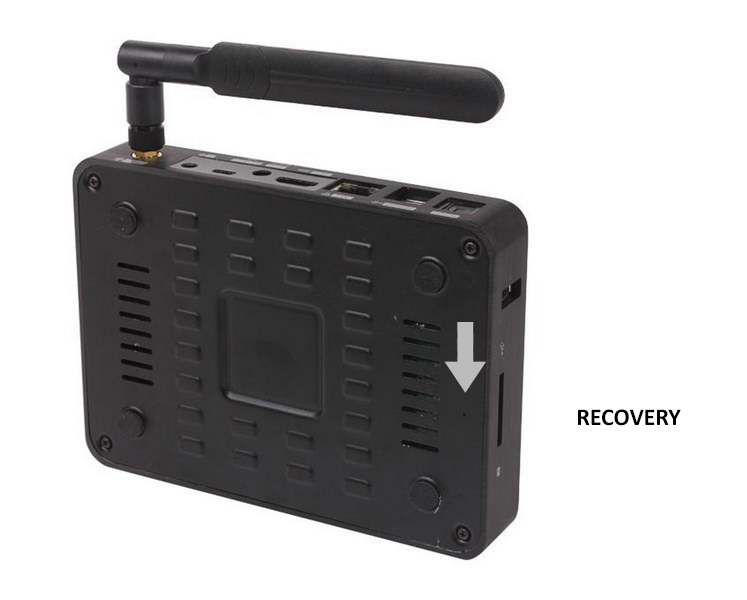
UM3
Recovery button is from the left to antenna connector
OTG USB port is left one.

UM2
UT2

UT1
This is a common guide for reflashing RockChip based devices. All RK SoC supports the same applications and drivers for Host system. Differences can be in hardware parts, so you need to detect OTG port and recovery buttons correctly.
BEFORE START
What you need:
Image file
Host PC
USB OTG Cable
Supported host OS: Windows XP (32/64bit) Windows 7 (32/64bit) Windows 8 (32/64bit) Windows 10 (32/64bit)
The first thing you need is to download the archive with firmware. Inside archive, you find:
BatchTool or Android Tool - tool for reflashing
DriverAssitant - tool to install drivers and firmware image file
Firmware image
INSTALLING DRIVERS
Launch RK DriverAssitant and press “Install Driver”.
Apply all changes and warnings during installation until finishing message
CONNECTING TO PC
Run Batch tool or Android tool on your host PC.
In order to connect device with Host PC and run bootloader mode you should perform following steps:
1. Plug off device power adaptor.
2. Connect device to computer via usb OTG port, much better to use certified OTG USB cable from package.
3. Run Batch tool or RK Android tool
4. Hold the hardware recovery button.
5. Plug in power adaptor and Turn on device if not turning on automatically.
Tip: if you can’t hold recovery button or it’s broken you can reboot to bootloader from Ugoos power menu.
RECOVERY BUTTONS AND OTG USB PORTS LOCATION ON UGOOS DEVICES YOU CAN SEE IN THE END OF THIS INSTRACTION.
IF YOU USE ANDROID TOOL:
In Android Tool choose “Upgrade Firmware” inset. If you did everything correctly and the RK driver installed properly on your computer, ANDROID TOOL shows you message “Found One Loader Device “
Click “Firmware” button and specify the path to the firmware file. You need to wait until the program download information about the firmware, then it will display report on the screen. Now click “Upgrade” button to start reflashing device. At the end, you will see a report indicating a successful operation.
For flashing dualboot or clear linux firmware (for example dualboot UT3/UT3s/UM3 firmwares)
Run Android Tool. If you did everything correctly and the RK driver installed properly on your computer, ANDROID TOOL shows you message “Found One Loader Device “ In Android Tool choose “Download Image” inset. Default program configured to flash "clear" android on your device. If you want install “Dualboot” or “Clear Linux” click right mouse button by program window, and then select “Load config”.
3. Then choose one of configurations files:
config.cfg - if want flash only Android
config_dualboot.cfg - if want flash dualboot
config_linux.cfg - if want flash only linux
3. Now click the “Run” button to start reflashing device. At the end, you will see a report indicating a successful operation.
IF YOU USE BATCH TOOL:
Run the Rockchip Batch Tool and click on the “…” to choose file with firmware. If you did everything correctly and the driver is installed on your computer, you will see green light on one of the indicators.
Now click the “Upgrade” button to the firmware of the device. At the end, you will see a report indicating a successful operation.
OTG usb ports and recovery buttons on Ugoos devices:
UT4/UT3+ new UT3s
Recovery button and USB OTG port is on the right side
UT3/UT3s
Recovery button and USB OTG port is on the right side
UM3
Recovery button is from the left to antenna connector
OTG USB port is left one.
UM2
UT2
UT1


Comment